
Hi friends, here is a tag I made with stamps, dies, and paper from Heartfelt Creations. I started by tracing the tag on the patterned paper and cutting with scissors.


Angelica
Supplies:
Heartfelt Creations


Inks: Ranger Archival Ink (Jet Black), Distress ink (Bundled Sage, Forest Moss, Spun Sugar, Aged Mahogany)
Paper: Cardstock (Cream), Paper Temptress (White Parchment Vellum)
Accessories: 4" x 8" Tag, Art Glitter Pee Wee kit (My Valentine), Kaisercraft Sparklets (Princess), Heidi Swapp pink bling border, Lace trim, hand dyed seam binding, Craftpon Etsy Store (Antique Bronze Safety pin, Vintage Skeleton key charm), jump ring, beads and metal findings, pop dots
Instructions:
Size: 4"x 8"
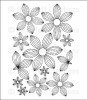
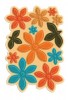
Trace tag on patterned paper and cut with scissors, tear a section towards the top of tag and roll paper as pictured, ink edges of paper with forest moss distress ink. Cut a piece of coordinating paper to cover the tag area were the paper was torn, ink edge with distress ink and adhere to tag. Cut two large corners from white parchment vellum with die from "Decorative Blossom" die set, use one corner to decorate the area were the paper was torn. Adhere patterned paper to tag. Stamp "Striped Sun Kissed Fleur" image on cream cardstock with black ink and cut with coordinating die. Stamp 2 each of 2 designs of the leafy branches from "Open Leaf" set on cream cardstock, cut with coordinating dies. Choose 4 flowers, different sizes and color with spun sugar and aged mahogany, sprits back of cardstock with a light mist of water and shape petals to give the flowers a distressed look. Color leaves with bundled sage and forest moss distress inks, shape with paper blossoms tool kit. Take the second die cut corner and trim leaving only the center shape, adhere flower, leaves and lacy die cut as pictured. Stamp the "All Seasons Sentiments" image on cream cardstock with black ink, cut your favorite words or sentiment ink edges with distress ink and adhere with pop dots. Add a bow made with seam binding. Add a vintage safety pin decorated with a bead and metal findings, attach to the bow. Add the key charm to the safety pin with a jump ring. Adhere some white trim to the bottom of the tag and a border of pink adhesive rhinestones. Draw some swirls and little dots with art glitter dries clear adhesive and cover with pink glitter. Also add some glue to some of the flowers and cover with glitter.
Gorgeous and I love the flower!
ReplyDeleteAbsolutely gorgeous!!!!
ReplyDeleteSuch a stunning tag.
ReplyDeleteI love the way you distressed this flower...it is just fabulous. The whole tag is simply wonderful.
ReplyDeleteTotally adorable:) Love the embellishments and the flower is just gorgeous:)
ReplyDeletehugs Nikki x
Such beautiful details, like the torn back paper, great gems with the pin and lovely shaping of the flower!
ReplyDeleteAwesome tut loved the flower but want a tutorial for it . Plz sh onea
ReplyDeleteAwesome tut loved the flower but want a tutorial for it . Plz sh onea
ReplyDeletePlz give me a link to the vedio for making this flower
ReplyDeletePlz give me a link to the vedio for making this flower
ReplyDeleteHi Maneesha,
Deletehttps://www.youtube.com/watch?v=faTpandFJLI
This video has a tutorial on the basic shaping I used for my flowers. Thank you for your visit.